
Restaurant zones and key locations
The facility divides into eleven distinct zones noted across gameplay runs and official descriptions. You explore these areas to gather four exit keys, four code notes, and individual room keys.
| Zone | What is inside | Why you go there |
|---|---|---|
| Security / safe room | Puppet desk, security monitor terminal, spawn elevator | Check camera feeds, ask the Puppet for guidance, and input the final elevator code. |
| SERVICE HATCH B-2 | Crank wheel, HATCH SEALER gauge, basement stairs | Turn the wheel to 100% to access the restaurant floor; return here to escape. |
| Restaurant corridors | Hallway intersections, closet doors, ceiling vents | Main transit routes between wings; provides emergency closets when hunted. |
| Party room | Dining tables, party decor, storage boxes, locked door | Requires the party room key; contains searchable containers for exit keys. |
| Kitchen | Food counters, cabinets, sinks, locked door | Requires the kitchen key; holds cabinets to search and triggers Chica events. |
| Stage & Foxy's Cove | Main stage, curtained cove, animatronic stands | Shows the band performing on camera; origin point for Foxy's sprint attacks. |
| Parts & Service | Spare animatronic shells, workbenches, shelves | Searchable tool drawers and cabinets; frequent spawn point for code notes. |
| Manager's office | Office desk, filing furniture, locked entry door | Requires the manager's office key; holds drawers containing exit keys. |
| Storage & cold storage | Walk-in freezer, tall metal shelving, storage lockers | Dense concentration of searchable crates and lockers for key searches. |
| Arcade area | Arcade game cabinets, prize counter, open floor | Wide search space containing furniture containers and prize counter interactions. |
| Endo room | Endoskeleton patrol routes, inner storage locker | Requires the endo room key; reaching the rear locker unlocks the ENDO ROOM badge. |
Operating the security terminal cameras
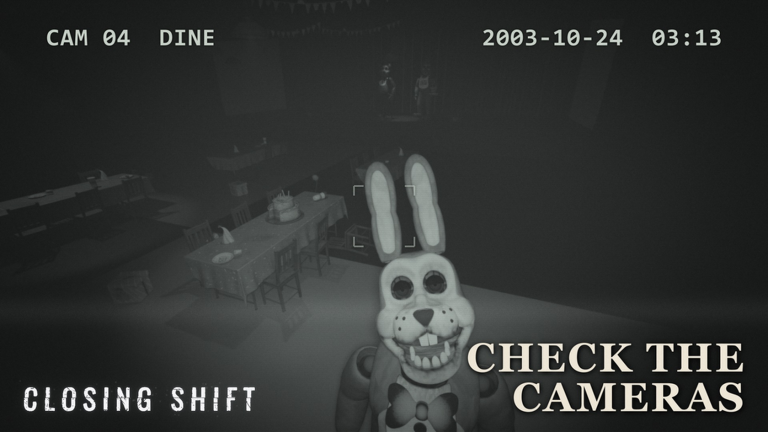
The feed label is the part worth learning from this frame: CAM 04 DINE marks the dining area, which is how the terminal tells you where you are looking.
The security monitor in the basement safe room lets you cycle between fixed surveillance feeds across the restaurant floor. Walk up to the desk monitor and press the interaction prompt to view live cameras.
Each camera angle displays an identifying feed label in the corner of your screen, such as CAM 04 DINE for the main dining area. Cycling through these feeds lets you verify whether the animatronic band is still on stage or moving through customer areas. The official listing confirms that the animatronic band still performs on camera while you explore.
Use the terminal feeds before opening new wings or after hearing heavy movement overhead. If a feed shows an empty stage or an animatronic walking past tables, you know that hunter is active in the corresponding wing.
Reading camera alerts and corridor warnings
While viewing the terminal or moving through corridors, the game displays on-screen alert banners. These text warnings read in formats such as Someone is outside 06, Someone is outside 07, or Someone is outside 08.
An alert indicates that a mobile entity is approaching or loitering near that specific camera zone. When you see this warning, take immediate precautions based on your current position:
- Identify whether you are working in or near the numbered zone.
- If you are near the alerted camera, step away from main doorways and prepare to use a closet or vent.
- If you are operating the basement terminal, switch directly to that camera number to identify whether the intruder is an animatronic or the squatter.
IMPORTANT
Which specific room camera 07 monitors remains unconfirmed in source records. The game provides no official room-to-number floor plan, so do not rely on speculative maps. Treat any numbered alert as an immediate signal that a hallway near that zone is unsafe.
Navigating back to SERVICE HATCH B-2
When you finish collecting exit keys and code digits, you must retrace your steps to the basement safe room. Because the restaurant has no map HUD, use environmental landmarks to guide your return.
Locate the central hallway connecting the dining rooms and search for the basement stairwell door. Descend the concrete steps until you reach the heavy circular hatch marked SERVICE HATCH B-2. Pass through the opened hatch into the safe room, where the security terminal and the EXIT CONTROL keypad stand beside the Puppet's desk. If you become disoriented during a chase, break line of sight in a hallway closet first, then step back into the corridor to find the stairwell doorway.